BASIC MICROPHONE PLACEMENT
Now that we’re able to make informed decisions in regards to selecting the best microphone for the job, we’re ready to place them on the instrument to get the best possible sound. As with microphone selection, placement of the microphone largely comes down to personal preference and how they sound in your specific room. Because building materials, layout, and location all effect how sound waves travel, a microphone placement technique that works in one room may not work in another. It’s important to remember that there is no “ideal” or “best” way to place a microphone! Try placing the microphone at various distances from the source, as well as at different angles until you receive the tonal quality and sound that you want. If you’re having a hard time finding a sound you like, try swapping microphones or isolating the sound. Here are some basic guidelines for placing microphones on different styles of sound sources:
AMPLIFIED SOUND SOURCES
The speaker cab of an electric guitar amplifier produces a wide array of tonal characteristics. Since speaker itself is directional, it produces different frequency characteristics at different angles and distances. As a result, there are a multiple different techniques for placing microphones on guitar amps. In a live sound setting, placing the microphone close to the sound source eliminates a wide array of instrument bleed, room noise and feedback.
ON-AXIS
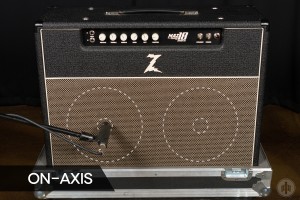
Placing the microphone on-axis (directly in front of the center of the speaker) will produce sharper, more biting tones. Using directional microphones, such as the Shure SM 57, you’re able to capture the majority of the guitar’s bite and sharpness while eliminating a fair amount of off-axis noise (mainly reflections, but room noise and instrument bleed).
OFF-AXIS
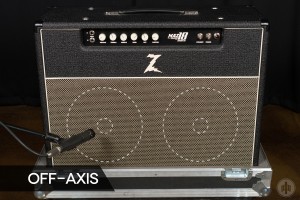
Placing the microphone off-axis (facing the speaker from an angle, instead of directly) will produce a mellower, more rounded sound. Again, using directional microphones here will allow some of the sharpness of the guitar to be lost in favor for some warmer sounds while still reducing a lot of off-axis noise.
DRUMS AND PERCUSSION INSTRUMENTS
The drum kit is one of the most complicated instruments to select and place microphones for. Each individual drum is considered its own instrument, and is (usually) given its own microphone. Because of the sheer loudness and proximity of drums, microphones should have high-SPL tolerances with a fair amount of off-axis rejection (dynamic microphones with cardioid polar patterns, for example).
KICK DRUM
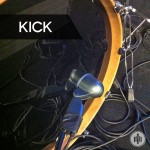 Unlike most other drums, kick drums have two distinct sounds that we’re trying to capture: attack and boom. For this reason, kick drum microphones should be placed inside about 1-6 inches the drum itself, with the capsule pointed directly at the beater head of the drum. This will allow the capsule to pick up the sharp attack of the beater, and as well as the boom and rumble of the drum.
SNARE DRUM
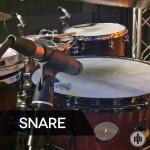 Snare drums are incredibly loud and piercing with a high transient ratio and very little sustain. The placement of the other instruments around the snare drum make placing a microphone on this instrument a bit challenging. The microphone should be placed over the top head, and roughly a 30°angle facing the head. This allows the cardioid pattern of the microphone to pick up the entire tonality the head provides, and cancels a lot of bleed from the hi-hat, toms, and other cymbals around the microphone.
RACK AND FLOOR TOMS
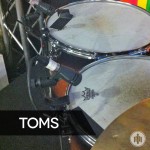 Microphones on rack and floor toms should be placed very similar to snare drum microphones- on the top head, and angled so that the polar pattern encompasses as much of the head as possible. Although the angle of attack selected for toms may be different from snares, due to the different pitch and timbre of the toms. Alternatively, for floor toms, the microphone can be placed underneath and inside the tom, with the capsule pointed at the head.
HI-HAT
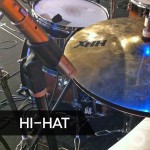 Microphones placed on hi-hat cymbals can be placed either straight at the top cymbal from above, or at a slight angle above the top cymbal. In either case, the distance away from the hi-hat should be enough to where the top cymbal does not impact the microphone when the hat is open, as well as not to be effected by the puff/vacuum of air that happens when the hat is opened and closed. Although the overhead microphones will pick up a great deal of hi-hate sound, it’s usually a good idea to have a dedicated hi-hate microphone for the musicians to reference, as it is primarily a time-keeping device.
OVERHEADS
Due to the complexity and multiple setups for overhead microphone placement, this will be covered in an advanced mic placement and techniques post at a later date.
USEFUL LINKS
For more detailed information on microphone selection, polar patterns, and individual frequency response charts, please visit the guys over at Recording Hacks. They maintain a database of over 1,400 different microphones from 123 manufacturers, with their frequency response charts, polar pattern listings and suggested uses. You can visit their website by clicking here.
Shure microphones also publishes a list of microphone placement and selection suggestions, but all of their information is based around their microphones and may not be viable for non-Shure microphones. You can visit their webpage and check out what they have to say by clicking here.

